
Force Byte
Printing Worksheets in Excel (3)
This time I will elaborate on the settings of the "Margins" tab.
Setting Margins
If you click the "Margins" tab on the "Page Setup" dialogue box, you will see the following content in the dialogue box (see Figure 1).
Figure 1
Through it, you can adjust the print margins. In addition, you can adjust the print position of the worksheet. Each field and its corresponding function is explained as follows:
* Top:
This enables you to set the distance from the top edge of the paper to the top margin directly.
* Bottom:
This enables you to set the distance from the bottom edge of the paper to the bottom margin directly.
* Left:
This enables you to set the distance from the left edge of the paper to the left margin directly.
* Right:
This enables you to set the distance from the right edge of the paper to the right margin directly.
* Header:
This sets the distance from the top edge of the paper to the header.
* Footer:
This sets the distance from the bottom edge of the paper to the footer.
* Centre on page:
This sets the print position of the worksheet on the page. There are two options available, namely "Horizontally" and "Vertically". As a result, we can form the following four compositions:
"Sharing IT as it applies to your daily life."
(E-mail address: ITB_ForceByte_Editor@police.gov.hk)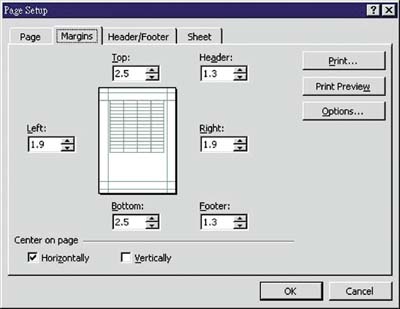
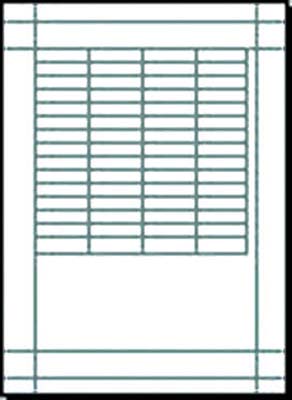 Non-horizontal & non-vertical
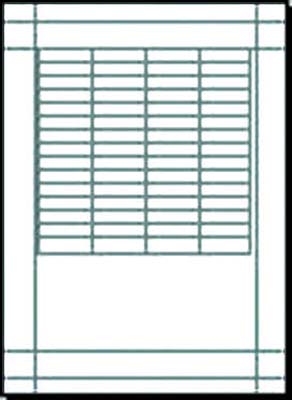 Horizontal
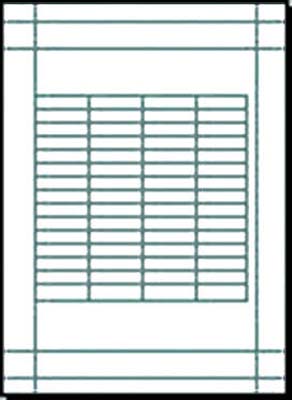 Vertical
 Horizontal & vertical